How to Standardize Unique Default Skins for Each of Your Different Environments
Many organizations utilize multiple Cognos environments as part of their development process, such as development, QA and production servers. It is not uncommon for users (especially system administrators and developers) to become confused about which server he/she is working on as all of the environments look the same. (logo, background, font etc). So how can you easily distinguish between these various environments?
Here we describe a simple technique to apply a common skin for each different Cognos environment regardless of what a user has set in their profile. This method can be used to set one skin in development, and another in the Test/QA system. In production, you can choose to allow each user to select a skin, or to enforce a standard.
When an individual user logs into Cognos for the first time, their individual profile is set. Because it is set at an individual level, administrative changes to the Cognos default profile will not affect them. For example if you had 50 experienced users and 10 new users, a change in the default profile will only affect the 10 new users when they log into Cognos for the first time.
Let’s begin:
1. We’ll be working under the assumption of a Cognos 8.3 installation and will be providing instruction on how to change the skin on one server. This process can be repeated for every server (environment).
First select a skin to be used as the default skin for each environment. With each Cognos installation there are several skin sets delivered. By default the Corporate skin is used.
- Business
- Classic
- Contemporary
- Corporate
- Modern
- Presentation
Let’s say we decided on this arrangement shown below:
| Environment/Server | Default Skin |
| Production Environment | Corporate |
| Development Environment | Contemporary |
| QA Environment | Modern |
2. Let’s select an environment we want to change and log into that server. We will use the Development server for this example and based upon the matrix we created in step 1 we want to set the skin to Contemporary.
We can find the skin scheme files under:
Cognos rootwebcontentskins
A typical location on windows would be:
C:Program Filescognosc8webcontentskins
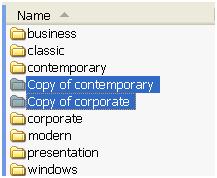
You will notice the following folders within the skins folder. We’ll be replacing the content within these skins with the content from the contemporary skin.

3. Select all the folders, copy them and then paste them in the same directory. We’ll be using these new folders as a backup of the originals. In this particular screenshot you’ll see that 2 of the folders have been backed up. You may want to changes the names of these folders to something like “Original – contemporary” or some other similar naming convention.
4. Now let’s ensure that everyone on this server sees only the contemporary skin. Open the contemporary folder, select all sub-folders and files within it. Make a copy and paste (overwrite) the contents from this folder into all other skins folders (except the backups you just created). We have effectively changed the contents of every skin to be the contemporary skin. Regardless of the skin that a user has set in their profile, they will always see the contemporary skin. Should you want to roll back or make future changes, you can always refer to the backup folders that we created in step 3.
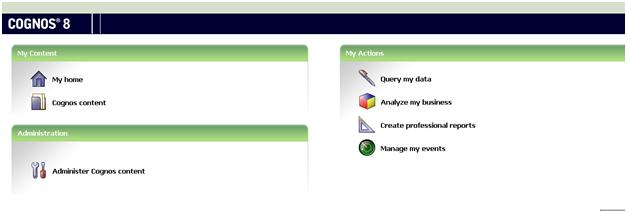
5. To confirm: Log into Cognos Connection. You will see the default skin has been changed (green scheme)
6. Repeat these steps for each environment, choosing a different skin as the default and copying the contents to the folders of every other skin.
Note: If you or any user can’t see the change immediately, you may need to clean the cached web pages/content from your web browser first. Here are the instructions for IE 6:
· Go to Tools->Internet Options
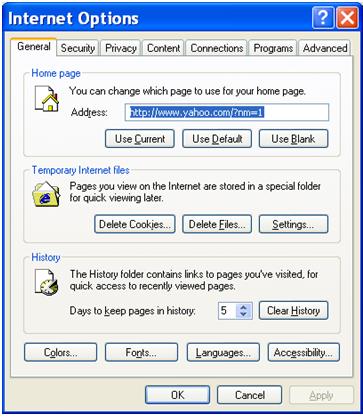
- Temporary Internet Files section click on Delete Files button. It opens a small Delete Files window. Check “Delete all offline content”.

- Click Ok. Then Ok.
- Launch a new Cognos session. You should now see the new skin.