TM1 Cell-level Security, Custom Security Cubes and Rules
TM1 version 9 introduced the concept of cell-level security, allowing users to secure individual cells without the need for a complicated matrix of element-level security cubes. Cell-level security can quickly become cumbersome, as each cell within a cube requires its own security setting. This article demonstrates how to use rules and a custom security cube to utilize this feature effectively. The IBM sample server GO_New_Stores will be used as an example.
Cell security works by an administrator creating a cell-level security control cube that contains all of the source cube’s dimensions, with the “groups” dimensions added. This new cube allows security to be applied for any specific cell or grouping of cells. By default, the cube contains no security settings and therefore does not apply any security for any cell(s). This gives users whatever access has been applied by the cube and element-level security models, while the cell-level cube security does nothing.
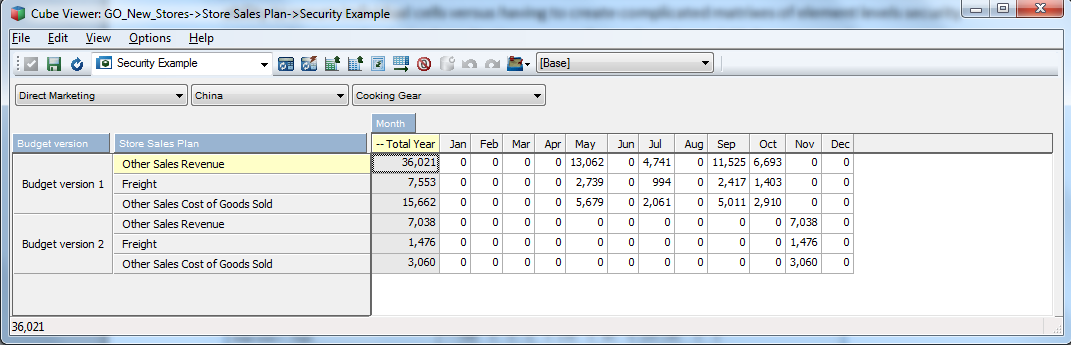
Look at the view below from the Store Sales Plan cube. In this example, we would like to prevent users from updating the months Jan through Mar for Budget version 1, and all input for all months to Budget version 2 while at the same time, still allowing security based on the cube or other dimensions to apply.
What happens if we would like to prevent users from updating Jan through Mar for Budget version 1, but allow all months to be input for any other version, at the same time still allowing any other security to apply?
The simplest way to address this is to create a cell-level security cube for Store Sales Plan. To do so, the steps are as follows:
- Right click on the cube GO_New_Stores.
- Select Security > Create Cell Security Cube.
- Display Control Objects, under View, if you have not already done so.
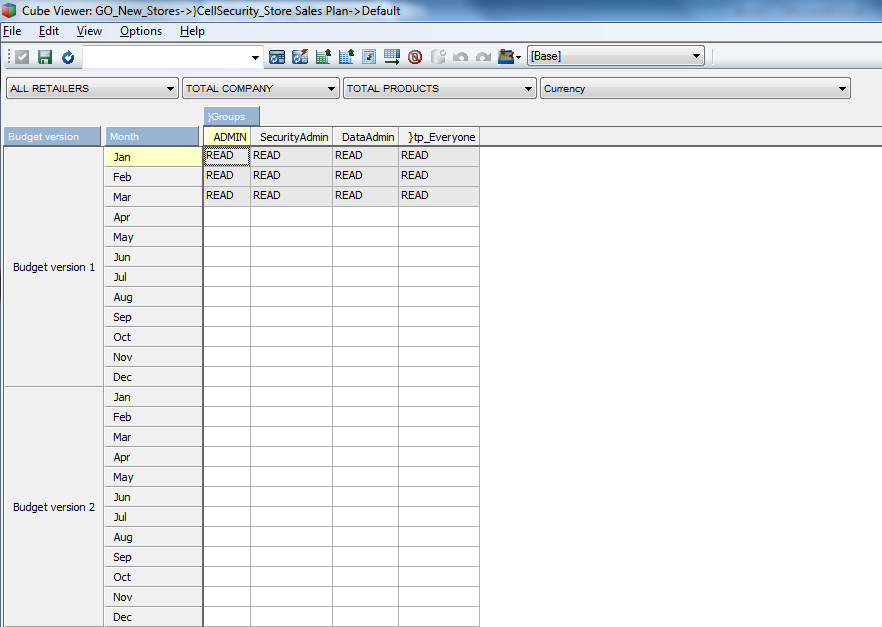
- Locate cube }CellSecurity _Store Sales Plan.
![]()
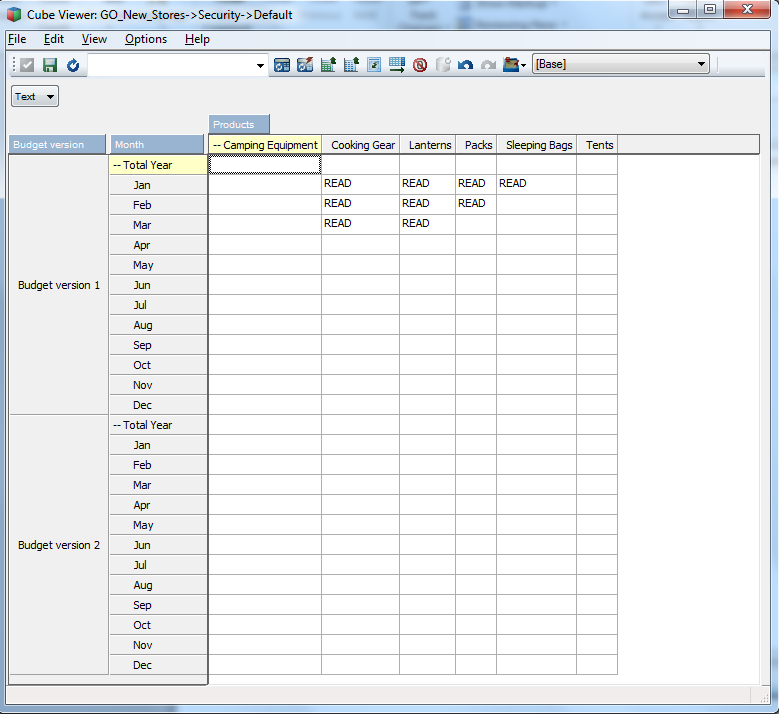
Once that cube has been located, create a rule file for it and enter the following:
[{‘Jan’,’Feb’,’Mar’},’Budget version 1′]=S:’READ’;
Note that because this is a security cube Skipcheck and Feeders are not needed.
Now when the security cube is queried, the results should look like the image below. Note, where the security cells are blank, cell-level security is not applied.
Now when a user queries the cube they will see:
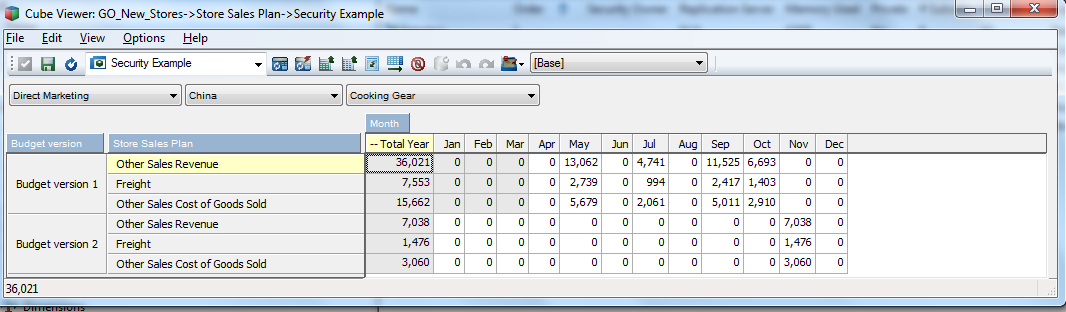
Notice how Jan through Mar is now not available for input for Budget version 1.
Custom Cube Scenario
However, what happens if users would like to secure multiple cubes across multiple dimensions? A custom security cube can be created that all applicable cubes can reference to update and manage their cell level security. To do so, the steps are as follows:
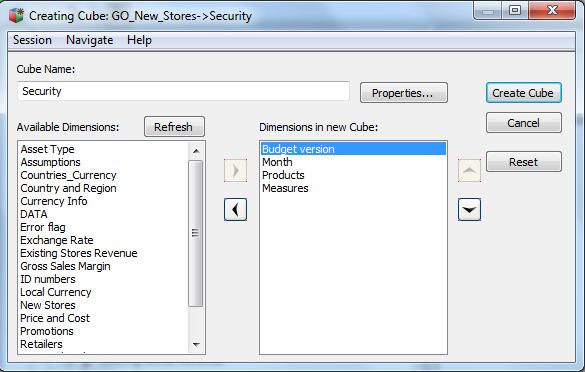
1. Chose the dimensions you would like to secure (the example below uses Month, Budget version, and Products).
2. Create a cube with the chosen dimensions and a measure dimensions with a string input element. The name of the cube is irrelevant, but the example uses Security.
3. The new cube can be populated like any other cell-level security cube, with READ, WRITE, or ADMIN.
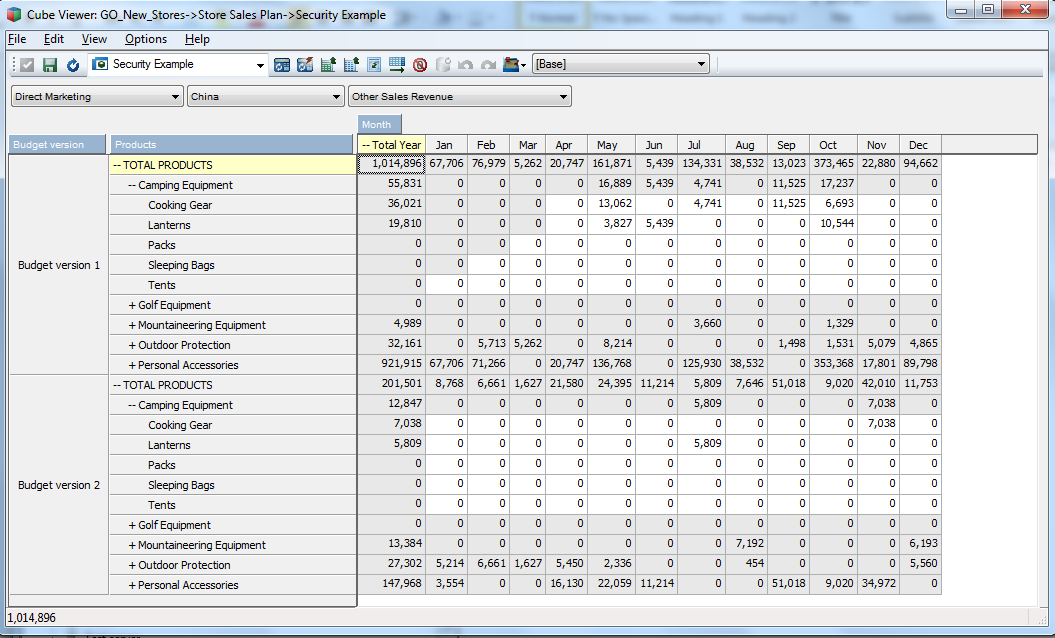
– Now the rule file for }CellSecurity _Store Sales Plan will be updated with:
[]=S:DB(‘Security’,!Budget version,!Month,!Products,’Text’);
The cube will now be referenced by the new cube and updated for any changes made in the security cube. Notice how the Store Sales Plan cube now has different security by product, version, and period as defined in the security cube.
This new cube could include any number or combinations of dimensions. It would even be possible to include the }cube control dimension to use one cube to manage different security for different cubes. You could also include the }groups dimensions and manage the security at the group level within your custom cube.