Integrating Information with a Cloud-Based Data Warehouse: Public Data Powered Part 2

This article is the second in our Ironside Public Data Powered series, which outlines how we can leverage public data to help us gain insights that drive stronger, faster business decisions. It will take a look at adding public data into a cloud-based data warehouse.
This time, we’ll return the scenario outlined in our inaugural article, where we take on the role of a product manager working at a fictional wholesale sporting goods company. Previously, we leveraged a combination of internal data and publically available weather data to gain insights using IBM Watson Analytics. In this article, we’ll explore what it takes to stand up a cloud-based data warehouse, perform transformations against that cloud-based data, and leverage our in-house implementation of Cognos BI 10.2.2 to analyze it. We’ll be using IBM’s newly introduced dashDB offering, part of the larger BlueMix Platform as a Service (PaaS) digital innovation platform.
Our first step is to sign up for a free trial membership on the BlueMix site (https://console.ng.bluemix.net/).
We’ll be leveraging our flat file-based data set from the previous article; however we can also bring in data from other cloud sources (Amazon S3 or Softlayer Object Storage), set up a continuous load/real-time refresh of data from an IBM Cloudant database, or set up a one-time load of geospatial data.
Once we have an IBM account enabled for BlueMix, we can create a Space for organizing our efforts (in this case I have create a Space called dashDB Demo) then assign services to that Space.
To leverage dashDB in our space, we start at our BlueMix Dashboard.
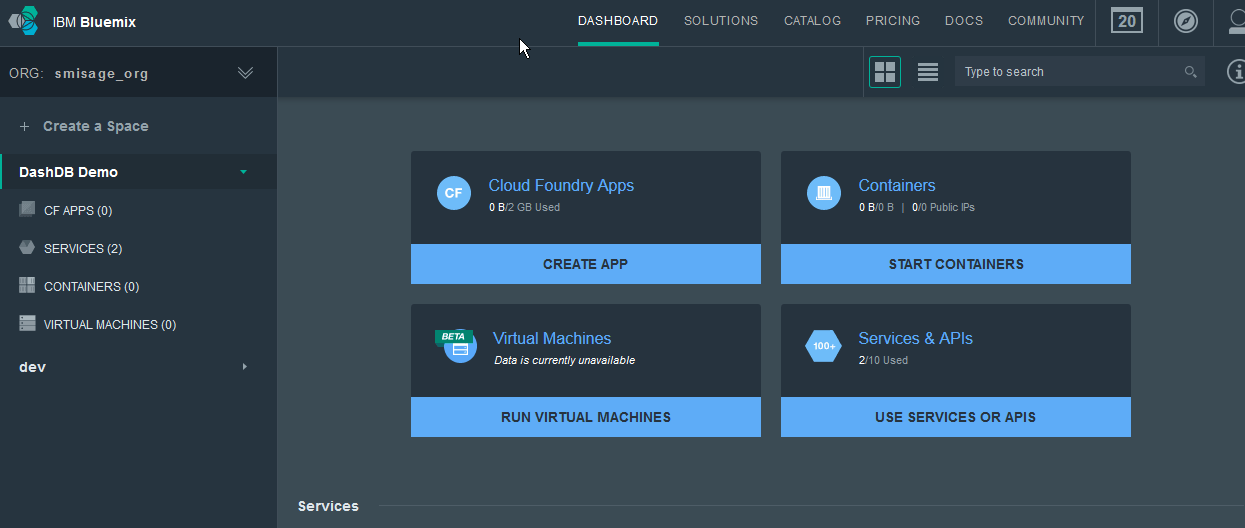
From there, we click on USE SERVICES OR APIS to access the Catalog.
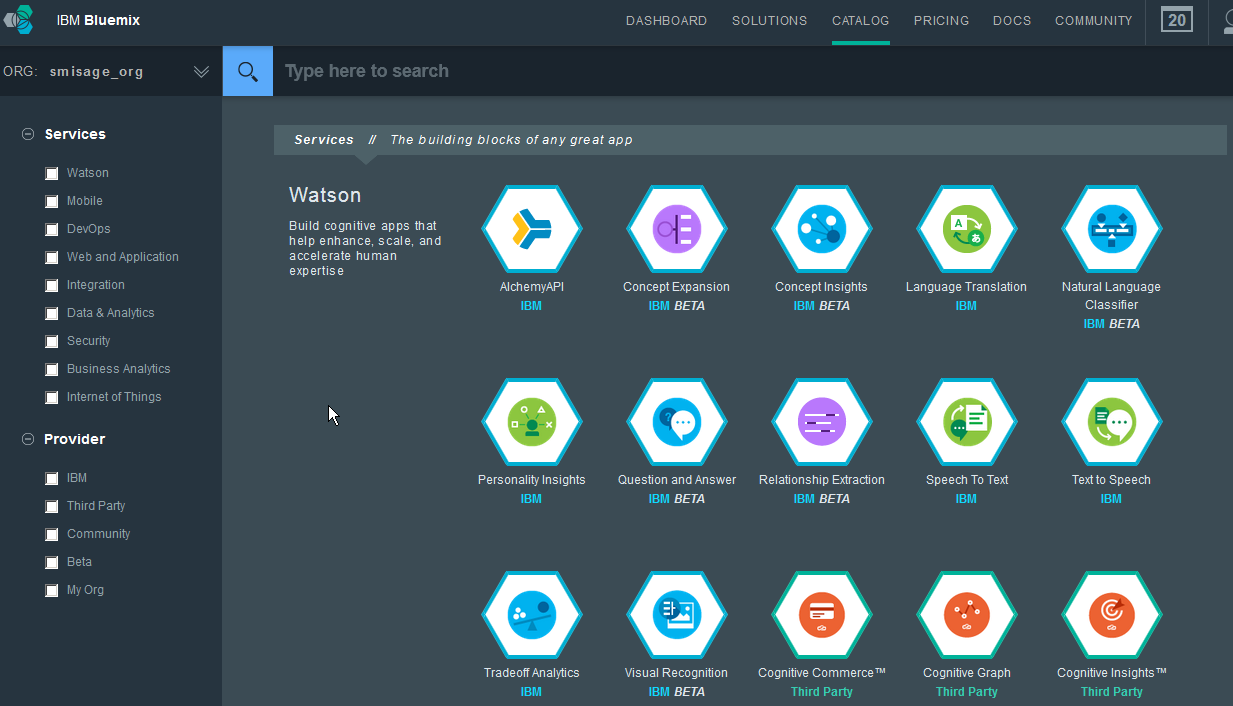
This interface presents us with all the various services we can use within our BlueMix Space. Hovering over each will give you some insights into what each does. In this case, we want to add a dashDB service to our Space so we check the box for Data & Analytics and choose dashDB from the list of services.

At this point, we can create the service in our Space and choose the type of plan we desire for our cloud-based data warehouse. Each plan has different features and monthly costs with the entry-level plan offering storage of up to 1GB of data at no charge, and up to 20GB for $50 per month (at the time this article was authored). Other plans offer more storage space and higher levels of system resources (RAM, Processors, Clustering, etc.) at higher price tiers.
You can also access the dashDB Learning Center, tutorials, and other documentation from this site to continue your enablement.

Once a service has been attached to your Space, you will see it in the Services section of your BlueMix Dashboard.
Next, let’s get our data loaded up by clicking on the dashDB Service on our Dashboard (I named ours ISGTest). From there, we can launch the dashDB Console and load our data.
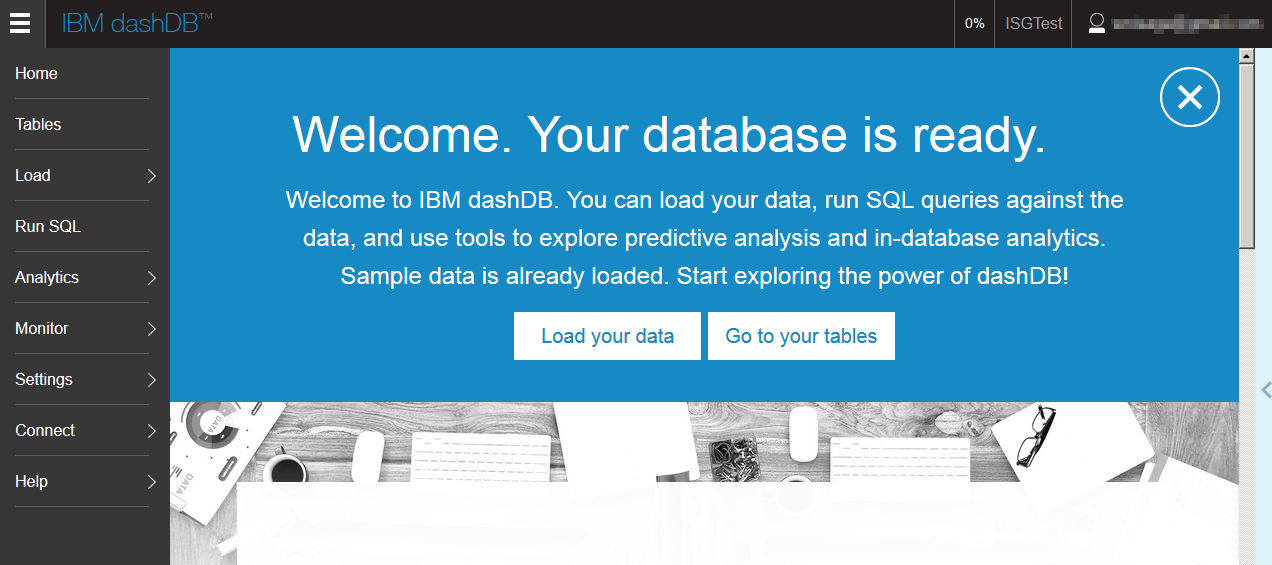
We will click Load Your Data > Desktop to load our combined Weather and Financial flat file into dashDB.
The system shows us a guided workflow that asks for the filename and some specific details about the data within the file, including the location of column names in the first row, the separator character, date/time information, etc. In addition to comma-separated data, we have the ability to load data from Microsoft Excel files as well.
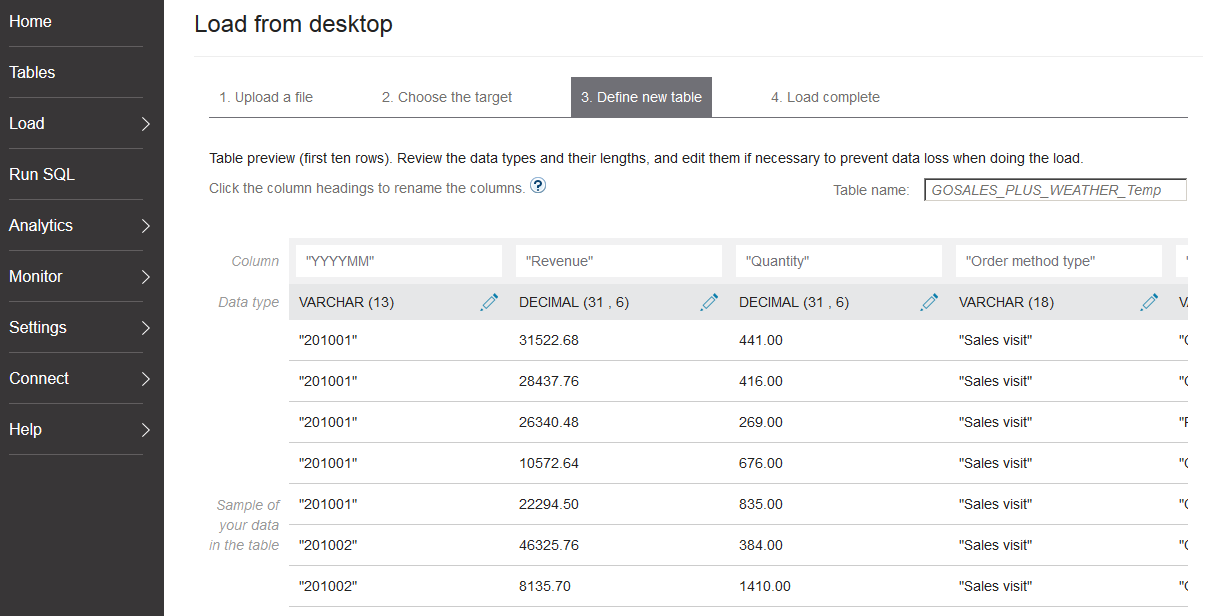
Next, we get the opportunity to preview the data to be loaded so we can choose to load the data to an existing table or a new table. In this example, we’ll load the data to a new table. Upon doing so, we can adjust the column names and data types that dashDB has assigned based on a sampling of the data. We can also change the table name. In this case, I’ve decided to change the table name (the default name is derived from the name of the data file to be uploaded) so that I can use this table to stage data for additional transformation.
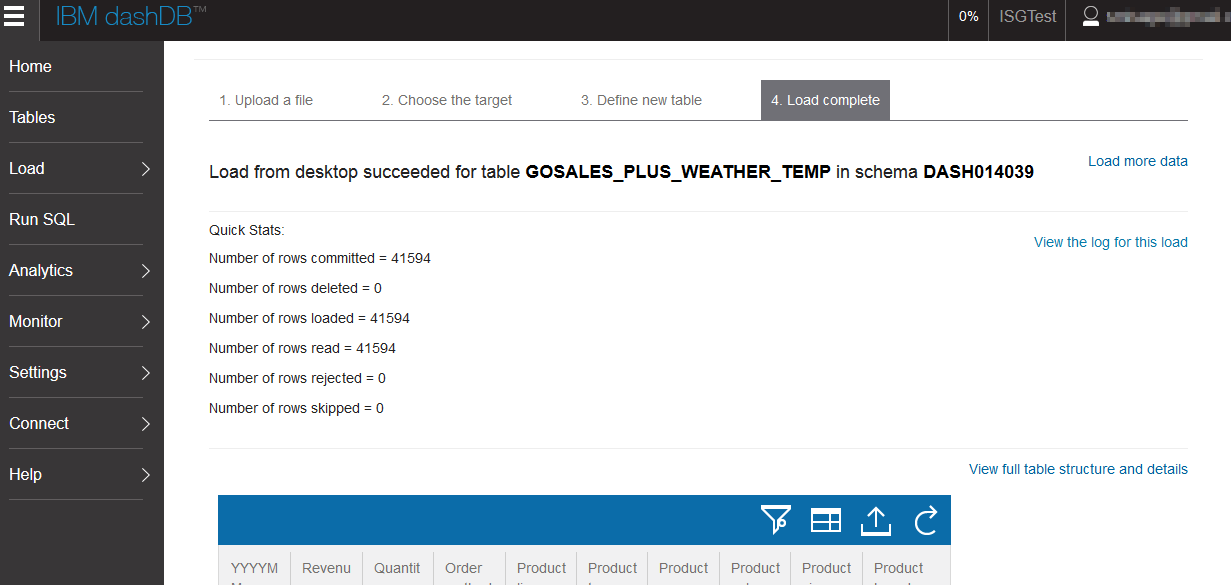
After the load is complete, we can review some Quick Stats about the data to ensure a complete load.
Next, we want to prepare the data for some transformation. The source data shows State Names as the full name, when what we really want is the abbreviation. We can use the same process we used previously to load up a data file of this information and call this table STATE_ABBR.
After that table has been created and the data is loaded, we can move on to transforming our existing data and storing the result in a new table that we’ll connect from the cloud-based data warehouse to our local implementation of Cognos BI.
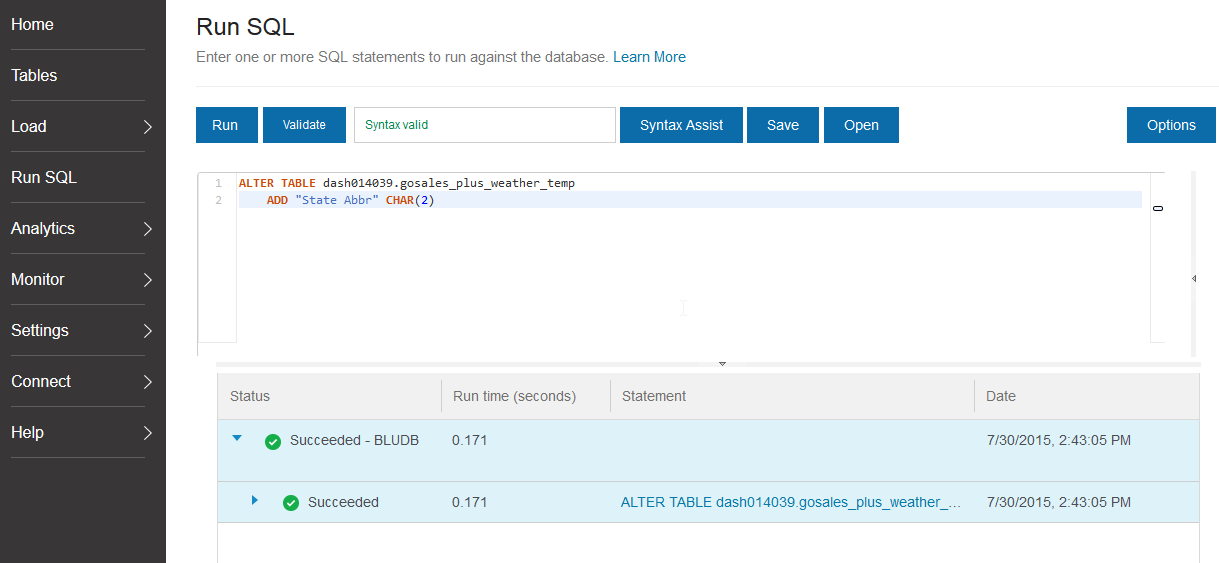
With dashDB, you have the ability to alter existing tables with SQL (in addition to creating new tables based on data files or other sources). We’ll use this functionality to alter an existing table for the state abbreviation data. To do this, we’ll choose the Run SQL option from our dashDB console and use some SQL code to add a column to our existing table.
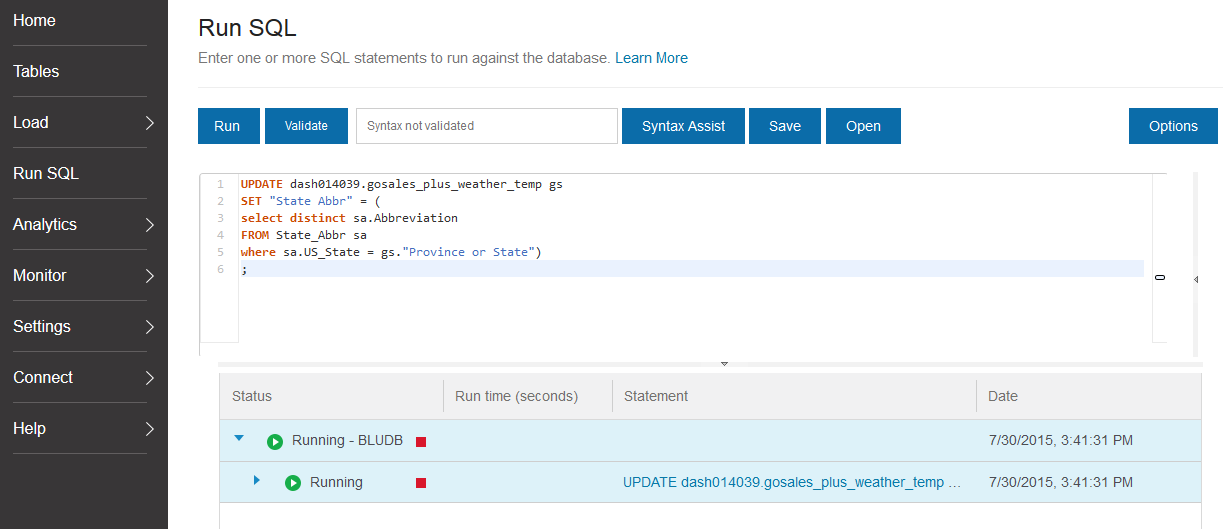
With this done, we’ll use some additional SQL code to update the State Abbr column with data based on the state abbreviations table we uploaded earlier.
After this completes, we can follow these guidelines from IBM to connect our cloud-based dashDB data source to an internal Cognos BI 10.2.2 environment.
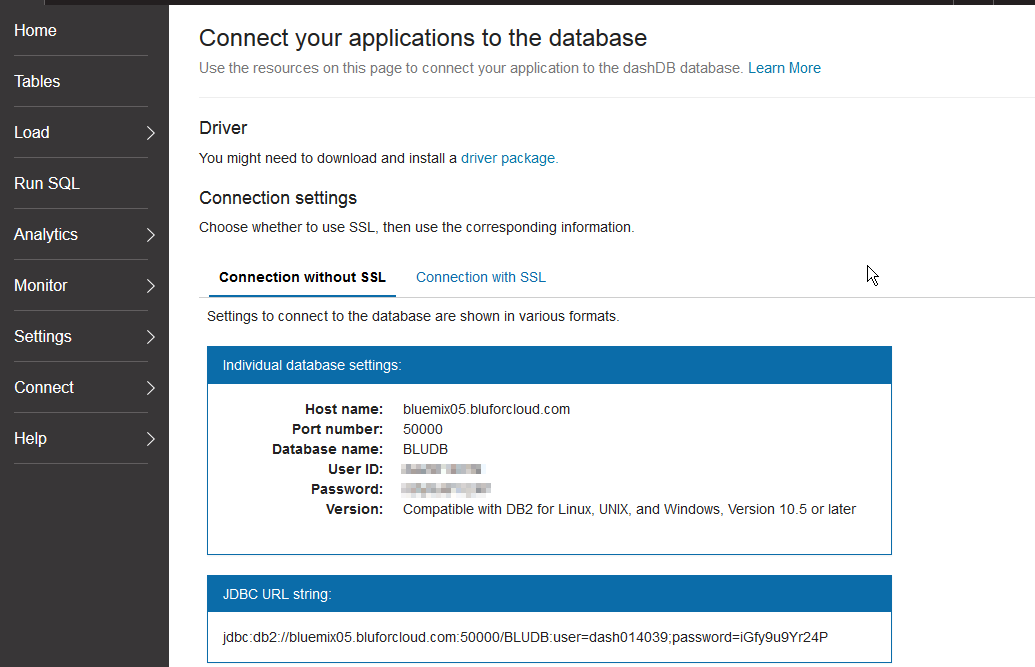
A critical step in making this connection work is capturing the appropriate connect string information (in SSL or non-SSL form) from dashDB. We can leverage the Connect section of the dashDB console to provide us with these specifications. In some cases, an addition driver download/install will be required, but the appropriate driver is available from the console as well.
Once dashDB is connected as a data source and published via a Framework Manager package, we can begin authoring reports and performing analysis against our cloud-based data warehouse data.

Thanks for tuning in to the Public Data Powered series. Make sure to be on the lookout for future articles featuring this data set. If you’d like to learn more about some of the cloud-based data warehouse strategies showcased here, please contact us. We look forward to helping you design your optimal data handling solution.